Using the bench
Rendering video
The Render panel turns a bench into a film: set camera keys along a timeline, choose a shape, and render straight to mp4.
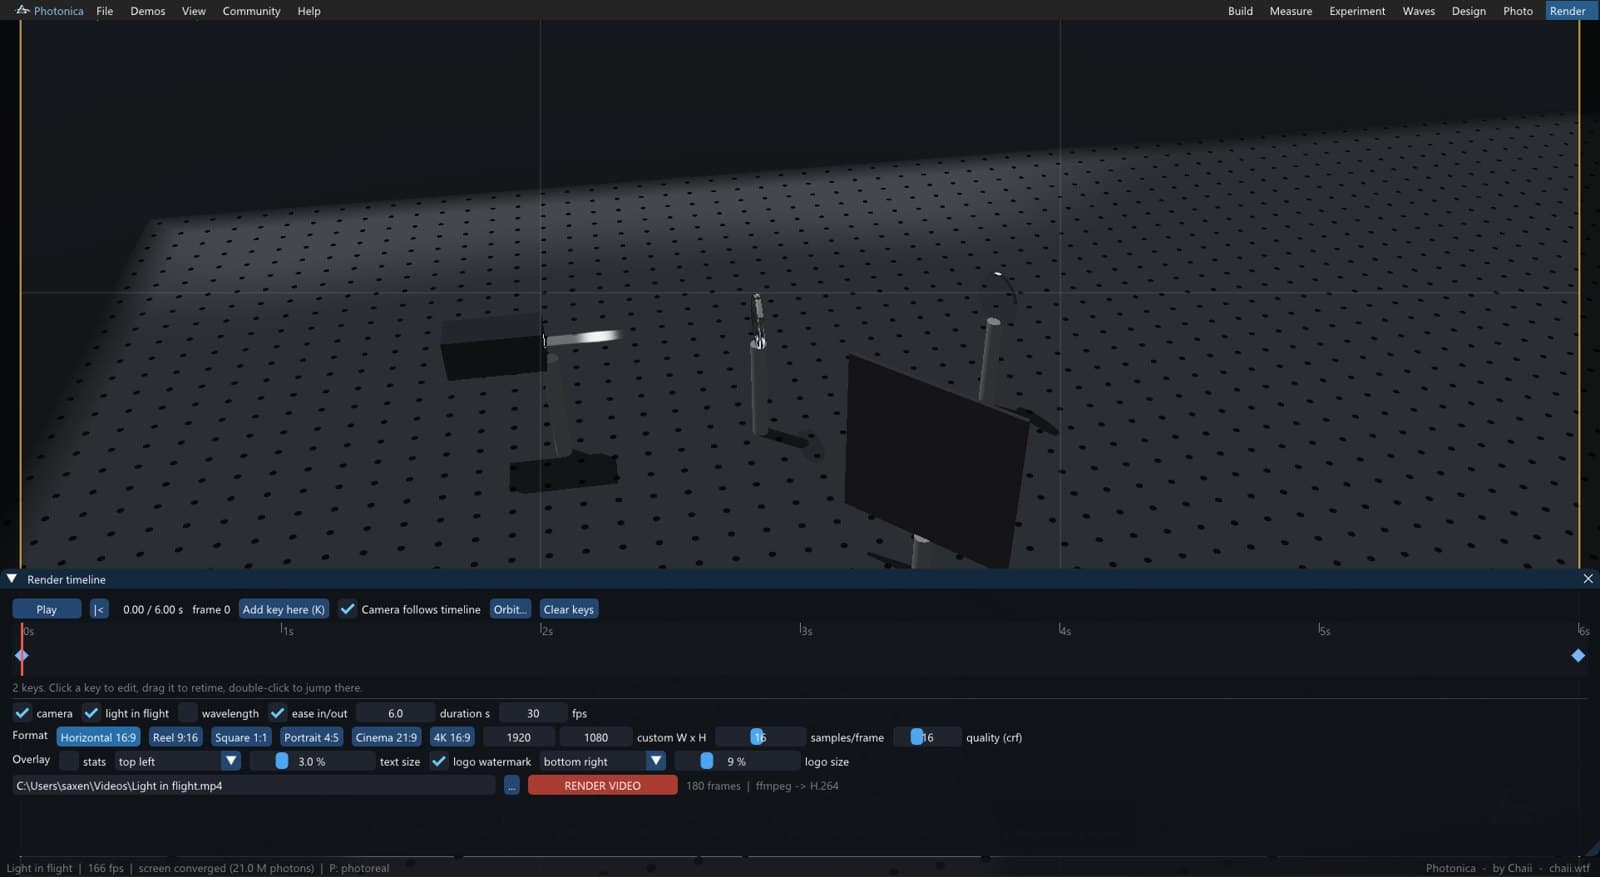
Camera keys
- Frame a shot in the viewport — the yellow guide shows the crop for your chosen format.
- Move the playhead, frame a different shot, and press K (or Add key here).
- Repeat. The camera interpolates smoothly between keys, with optional ease in/out at the ends.
With no keys at all, the render is simply the current view for the whole duration. Orbit… replaces the keys with a circular move around the current view — the quickest way to get a presentable clip.
Keys can also carry the light-in-flight clock and the wavelength, so a pulse can cross the bench or the colour can sweep across the spectrum while the camera moves.
Formats
| Format | Pixels |
|---|---|
| Horizontal 16:9 | 1920 × 1080 |
| Reel 9:16 | 1080 × 1920 — phone-shaped, for social |
| Square 1:1 | 1080 × 1080 |
| Portrait 4:5 | 1080 × 1350 |
| Cinema 21:9 | Ultra-wide |
| 4K 16:9 | 3840 × 2160 |
| Custom | Any width × height you type |
Quality
Samples per frame is how many passes are accumulated before each frame is written. In photo mode, 32–256 looks clean; in the fast view, 1–8 is plenty. fps, duration and the H.264 quality (CRF) are all set here too.
Burned-in overlay
Optionally the video can carry:
- Stats — the light-in-flight time, the slow-down factor, and the apparent speed of light on screen. Position and text size are yours.
- Watermark — the Photonica mark in a corner, at a size you set.
Press Esc to cancel a render in progress. Rendering resizes the internal buffer to the output resolution, so the preview will look different while it runs.